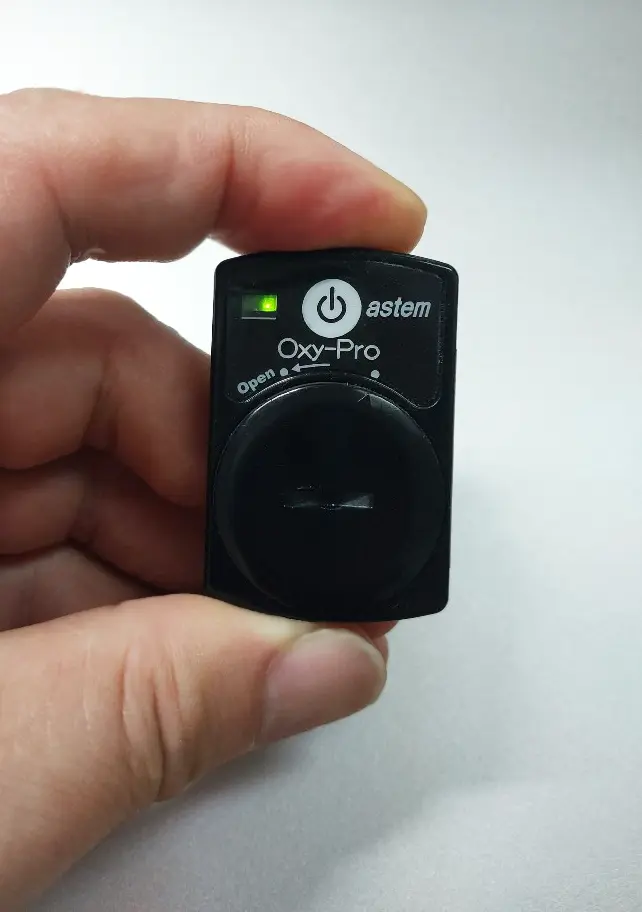
Windows11とのペアリング
![Oxy-Proの電源ON](https://blog.astem-jp.com/wp-content/uploads/2023/07/1.webp)
① Oxy-Proの電源を入れます。
![2](https://blog.astem-jp.com/wp-content/uploads/2023/08/2.jpg)
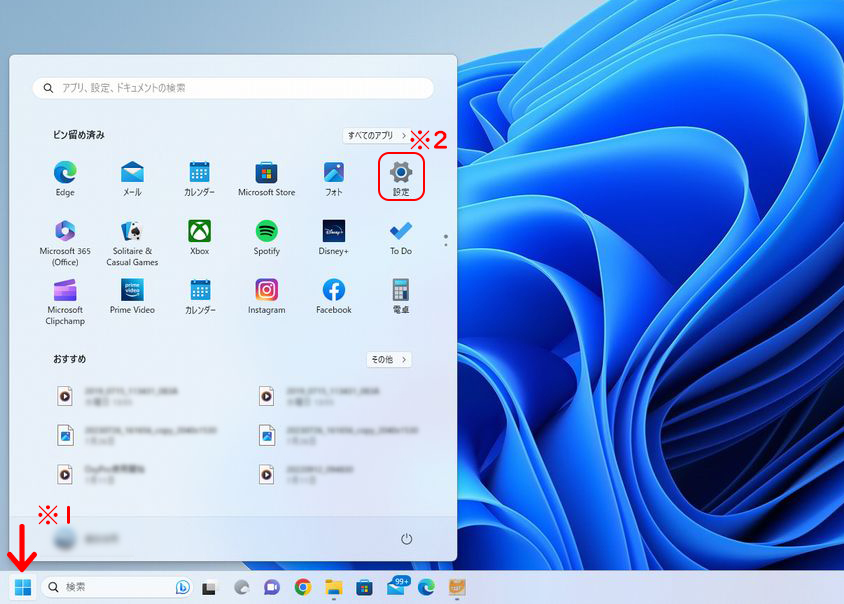
② Windows11のスタートボタンをクリックした後 設定を選択します。
![](https://blog.astem-jp.com/wp-content/uploads/2023/08/3.jpg)
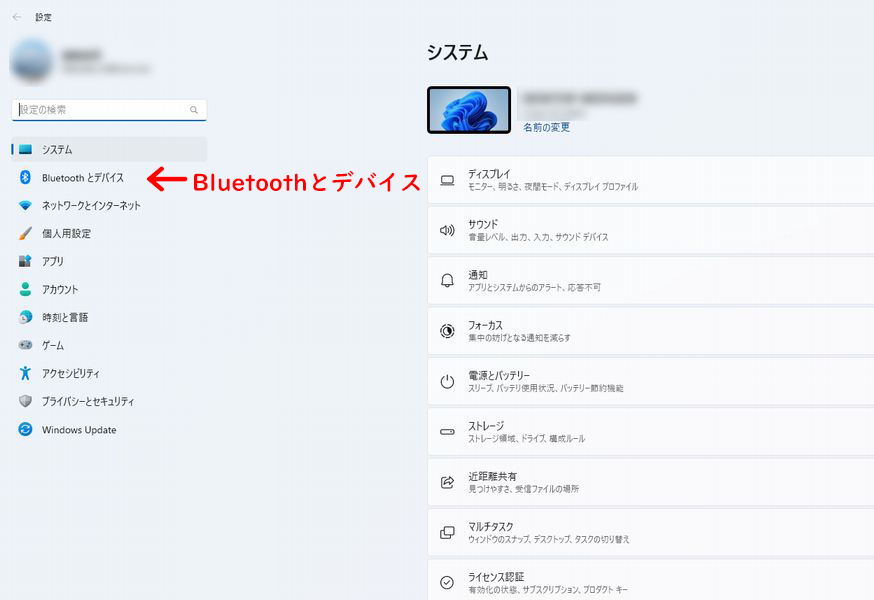
③ 設定画面でBluetoothとデバイスを選択します。
![](https://blog.astem-jp.com/wp-content/uploads/2023/08/4-1024x517.jpg)
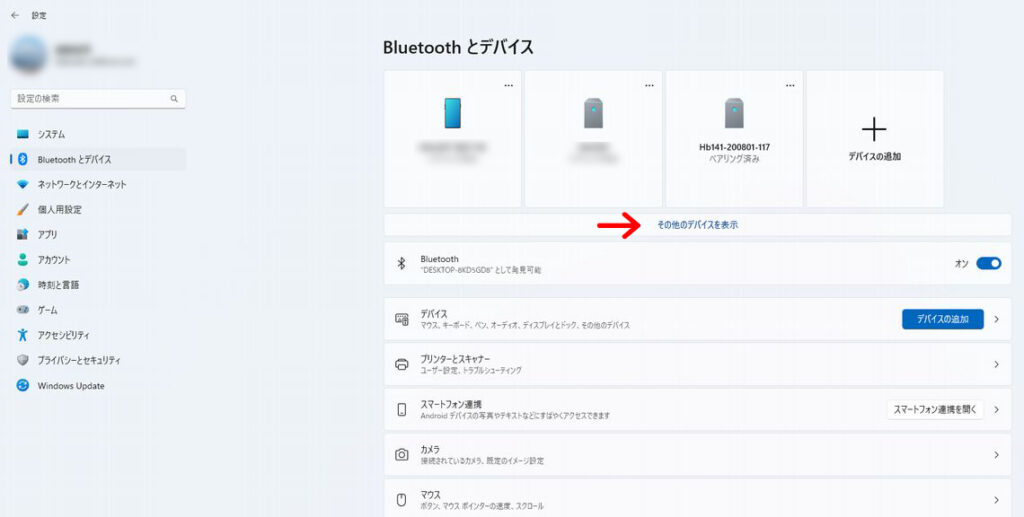
④ その他のデバイスを表示をクリックします。
![](https://blog.astem-jp.com/wp-content/uploads/2023/08/6-1024x677.jpg)
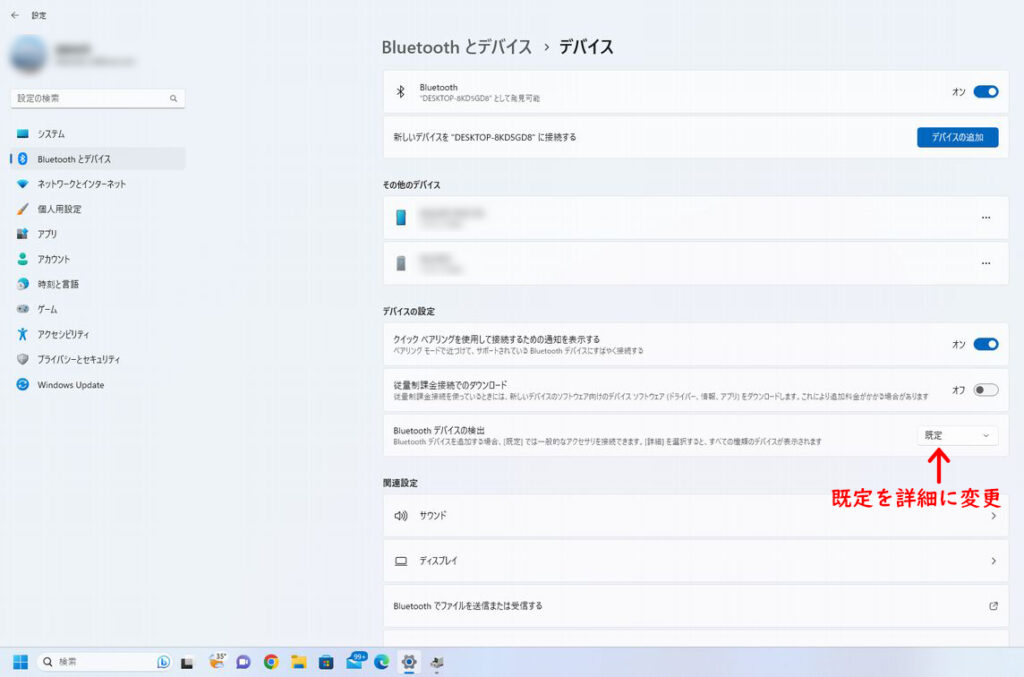
⑤ デバイスの設定 ➡ Bluetoothデバイスの検出を既定から詳細に変更します。
![](https://blog.astem-jp.com/wp-content/uploads/2023/08/7-1024x679.jpg)
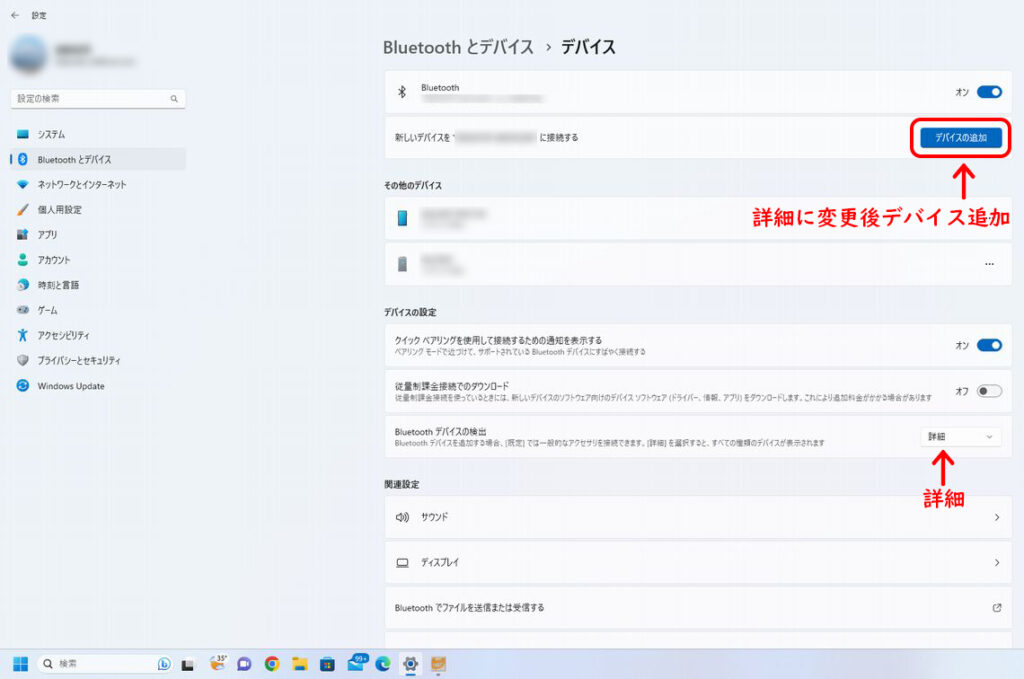
⑥ Bluetoothデバイスの検出を詳細に変更した後 デバイスの追加をクリックします。
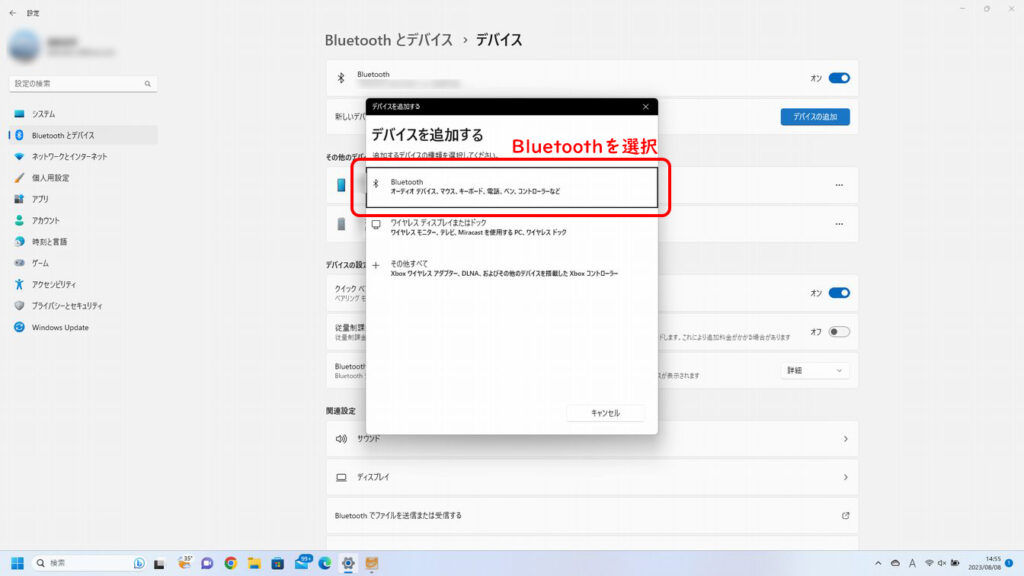
![](https://blog.astem-jp.com/wp-content/uploads/2023/08/8-1024x576.jpg)
⑦ Bluetoothを選択します。
![](https://blog.astem-jp.com/wp-content/uploads/2023/08/9-1024x679.jpg)
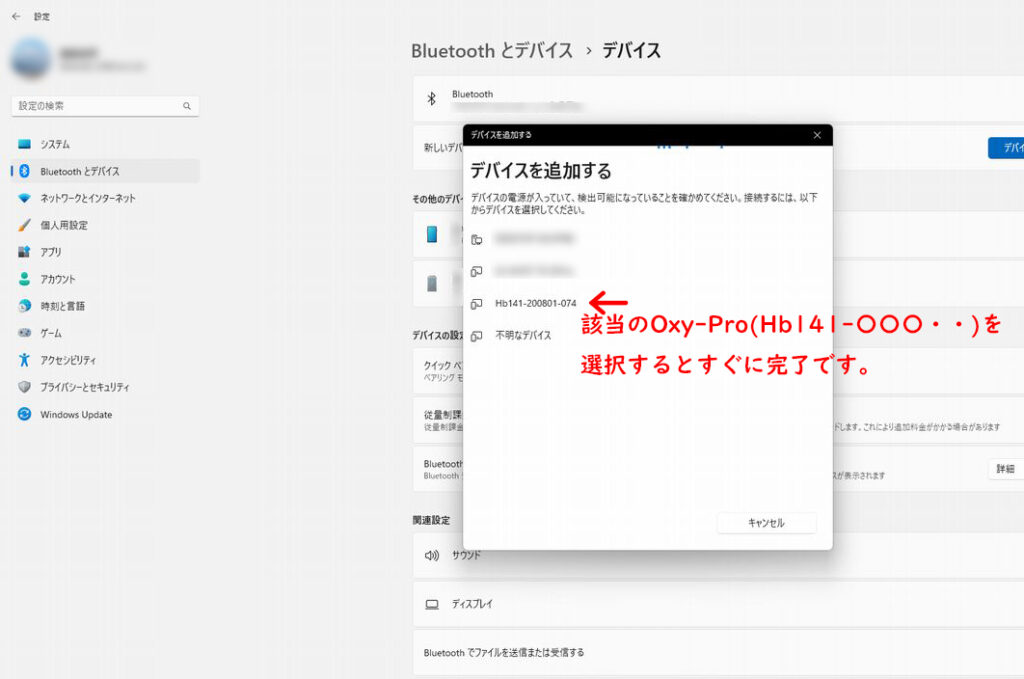
⑧ 該当のOxy-Pro(Hb141-〇〇〇・・)を選択するとすぐに完了です。
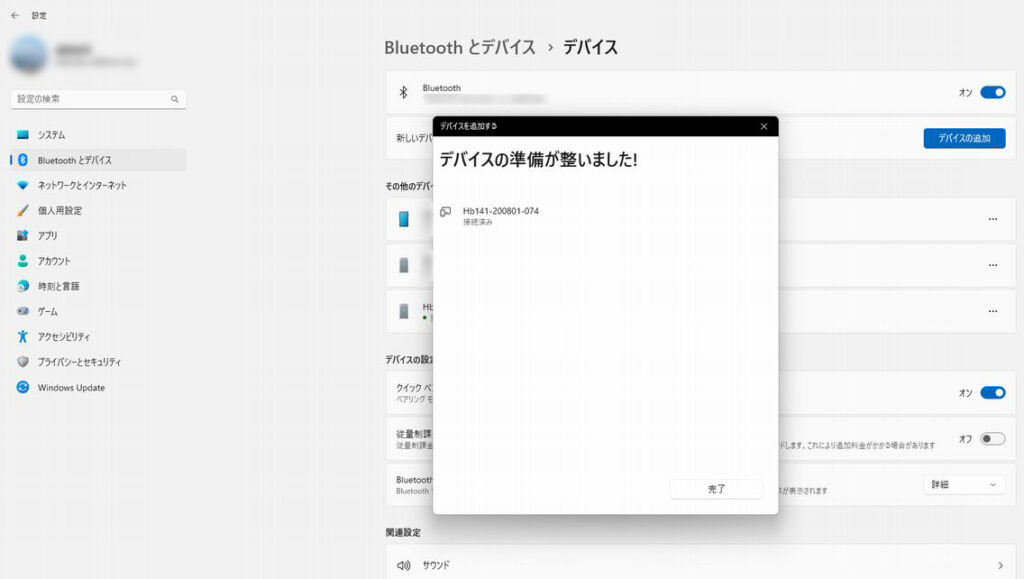
![](https://blog.astem-jp.com/wp-content/uploads/2023/08/10-1024x579.jpg)
⑨ 完了です。
お疲れさまでした。